- Download and install the STM32CubeProgrammer as per the instruction at STM32CubeProg - STM32CubeProgrammer software for all STM32 - STMicroelectronics

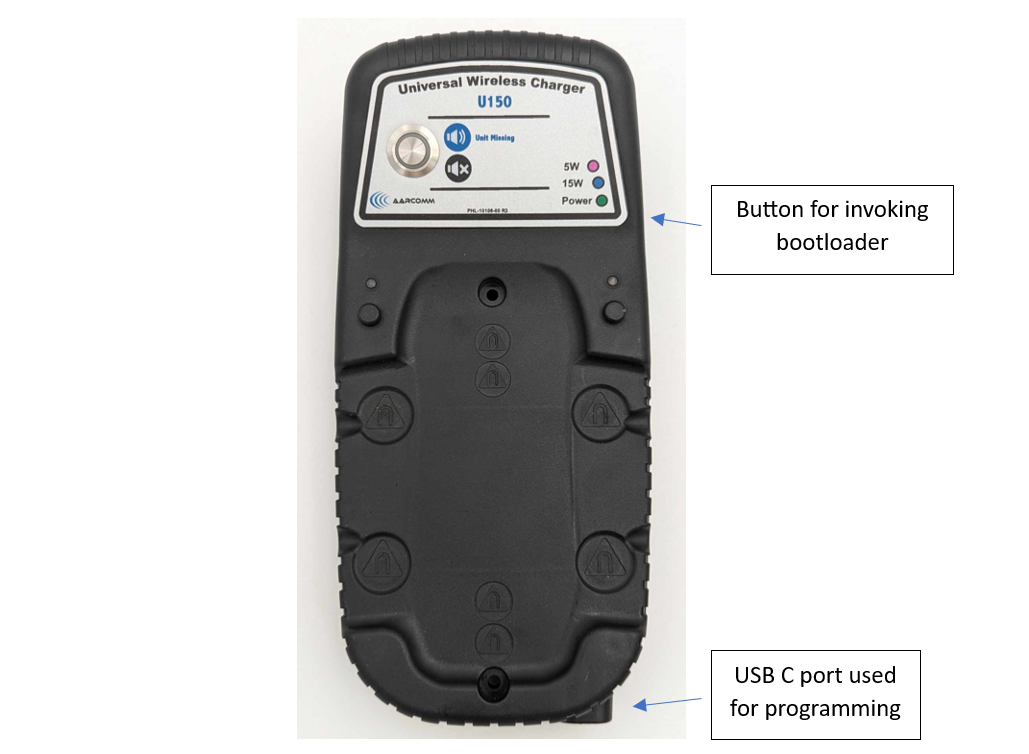
- U150 Physical overview – The U150 is field programmable via a USB C port on its lower edge. Boot loader mode and the connection to the PC/Programming software (STM32CubeProgrammer) is invoked via the button on the right-hand side of the case. Power for programming functions is supplied via the USB C programming cable. Please see the picture below for the relative positions of the programming features.
- Physical connection:
- Start the STM32CubeProgrammer software on the PC.
- Insert the USB A end of the USB C to USB A cable into the PC.
- Hold down the bootloader button on the U150 while plugging in the USB C end of the cable into the USB C port of the U150. Usually, the PC will annunciate a USB connection indication at this time.
- The U150 should now be connected to the PC and the STM32CubeProgrammer software. Advance to the programming aspects of this procedure.
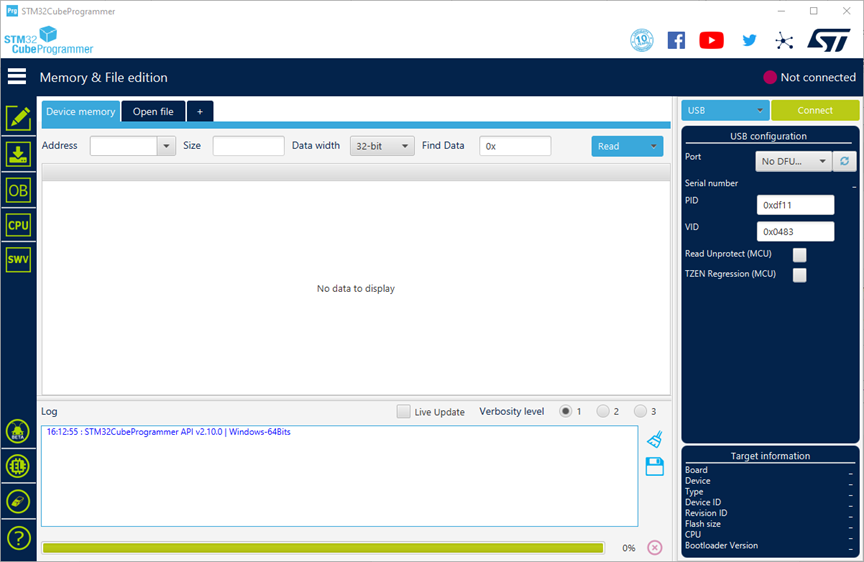
- STM32CubeProgrammer software GUI - Below is the GUI for the programming software. Here the connection to the U150 will be established and the firmware file to be programmed will be chosen. This is the default screen when the software is started.
- Programming procedure:
- Establish a connection to the device to be programmed. In step “3. Physical connection” above the physical connection between the PC and the U150 has been established. Now we need to get the STM32 Cube Programmer to recognize the connected U150. To do this you may have to press the “refresh wheel” at the top right of the display (just below the “USB Configuration? Menu header. Once you do this, you should see the following:

- No press the “Connect” button that is in the upper right of the GUI to connect the programming software to the bootloader inside the STM32 Processor. Once you do, you should see the following. Note that the red dot (upper right hand corner) with “Not Connected” beside it is now a green dot with “Connected” beside it.

- Now choose the file to be downloaded to the U150. Do this by clicking on the “OPEN FILE” tab upper left of GUI and then navigating to the file that was sent to you by Aarcomm. The file name should be formatted in the following way -> FPM-xxxxx-xxxxx-xxx.bin. Below is an example.

- Configure the programming process/download and then program the U150.
- The first step is to switch to the programming screen. Click on the downward arrow on the left-hand side of the screen to do this. See below.
- Confirm the “Start Address field is showing “0x08000000”
- Make sure that “Skip flash erase before programming” is un-checked (as below)
- Check “verify programming”, and
- Check “Run after programming”, everything else can stay at defaults.
- Now use the “Start Programming” button (middle’ish of the screen) to start the programming.

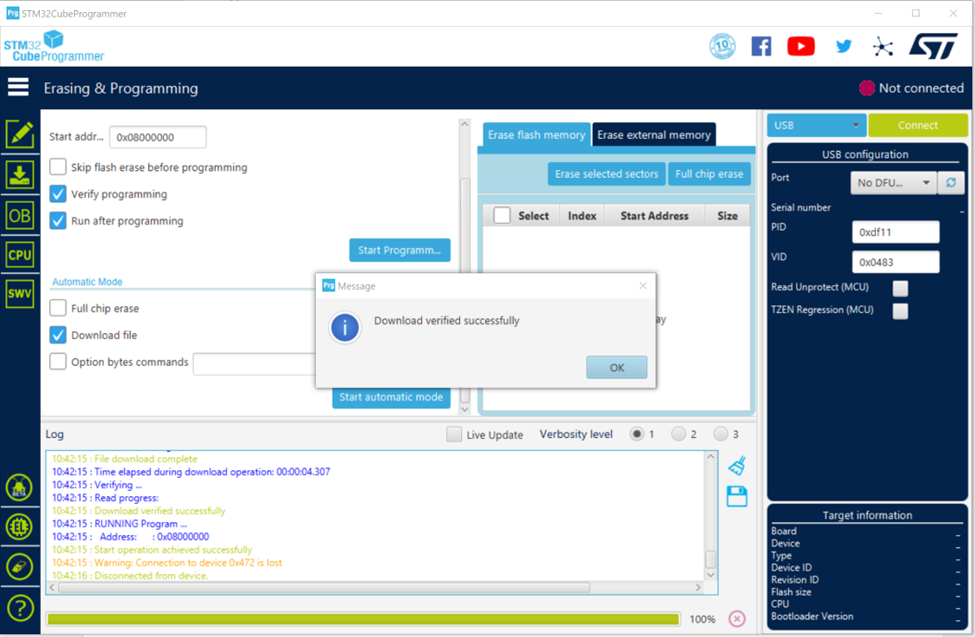
- Confirm completion – Several messages will appear in the log as the erasure and programming are proceeding. Also, several pop ups will appear in the middle of the GUI to indicate the programming state. Whether you use the log or the pop ups to verify completion all you are looking for is “Download verified successfully”. (see below). In this picture the “Download verified successfully” can be seen in both the log and the pop up. This means the programming completed successfully and the U150 is ready to be re-deployed.
- Establish a connection to the device to be programmed. In step “3. Physical connection” above the physical connection between the PC and the U150 has been established. Now we need to get the STM32 Cube Programmer to recognize the connected U150. To do this you may have to press the “refresh wheel” at the top right of the display (just below the “USB Configuration? Menu header. Once you do this, you should see the following:
Was this article helpful?
That’s Great!
Thank you for your feedback
Sorry! We couldn't be helpful
Thank you for your feedback
Feedback sent
We appreciate your effort and will try to fix the article